Zoetrope : Physical Computing Project 2
A 3D Printed Zoetrope

For our second project in Physical Computing, the class was promted to create an interactive object that could perform a simple task and utilize:
- a servo motor,
- a 3D printed component,
- and an advanced electrical component such as an external button.
I have been eager to learn 3D printing and how to potentially export my animation out of Maya and into the real world. This project was the perfect opportunity to realize this desire.
Below is a video presentation of my project and some of the process to make it happen. Please enjoy!
Brainstorming
As part of the design process, it is important to quickly explore as many ideas as possible within the frame of your idea and allow for deviations to occur which may lead to more a more rich final product. For this I used a combination of sketching on paper and collaborating with another student on Miro, a digital platform that makes mind mapping easy and collaborative.

|
|

|

|

|
Design
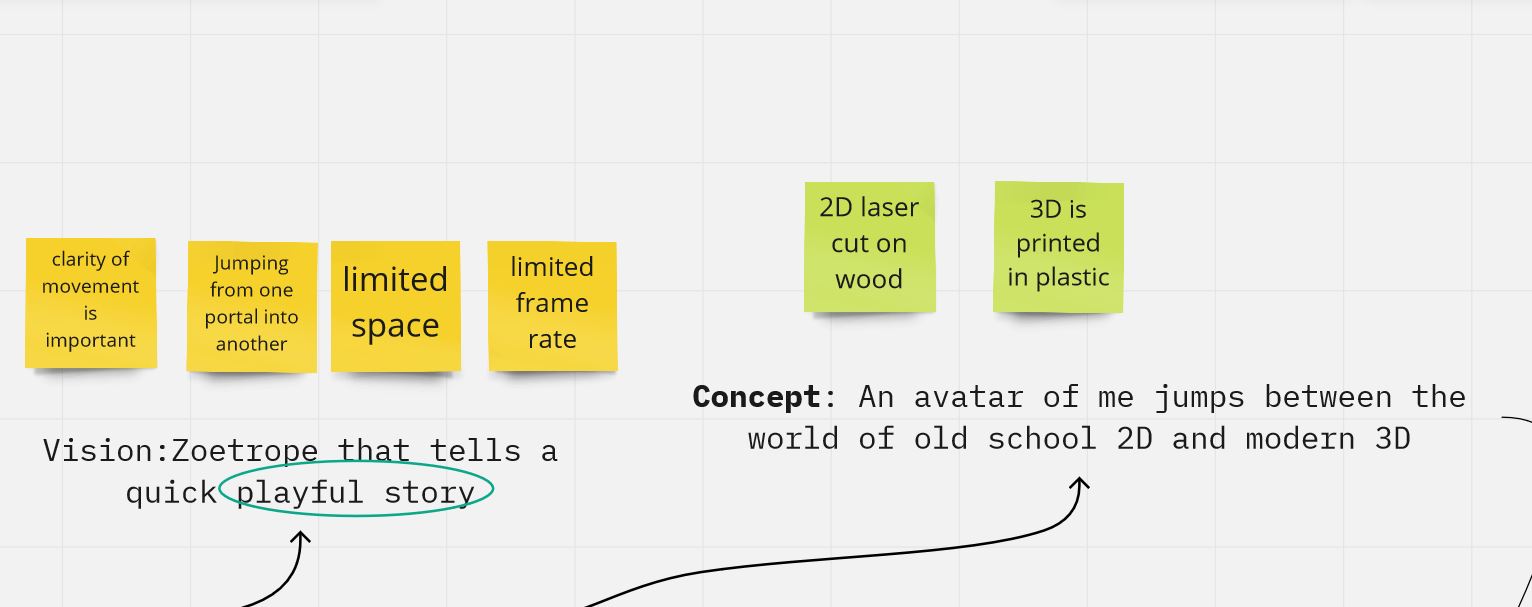
My original idea was to have a 3D printed character jump into a portal and re-emerge from the portal as a 2D drawing. This scenario would loop infinitely, but I soon would discover that the action was too complicated to register in my zoetrope, so I eventually scaled the action down to just the 3D printed character.
Nevertheless I had already animated the 2D subject, and used it as reference for the 3D animation in Maya.

In animating the 3D character, it was important to consider the 360
degree view of the action, and I tried to make sure the silhouette
worked from various angles.

Once the action was determined, I needed to figure out how to place the figures on the Zoetropes support base. I used a cylinder in Maya as a proxy for the real base and positioned the action appropriately.

|

|
|

|
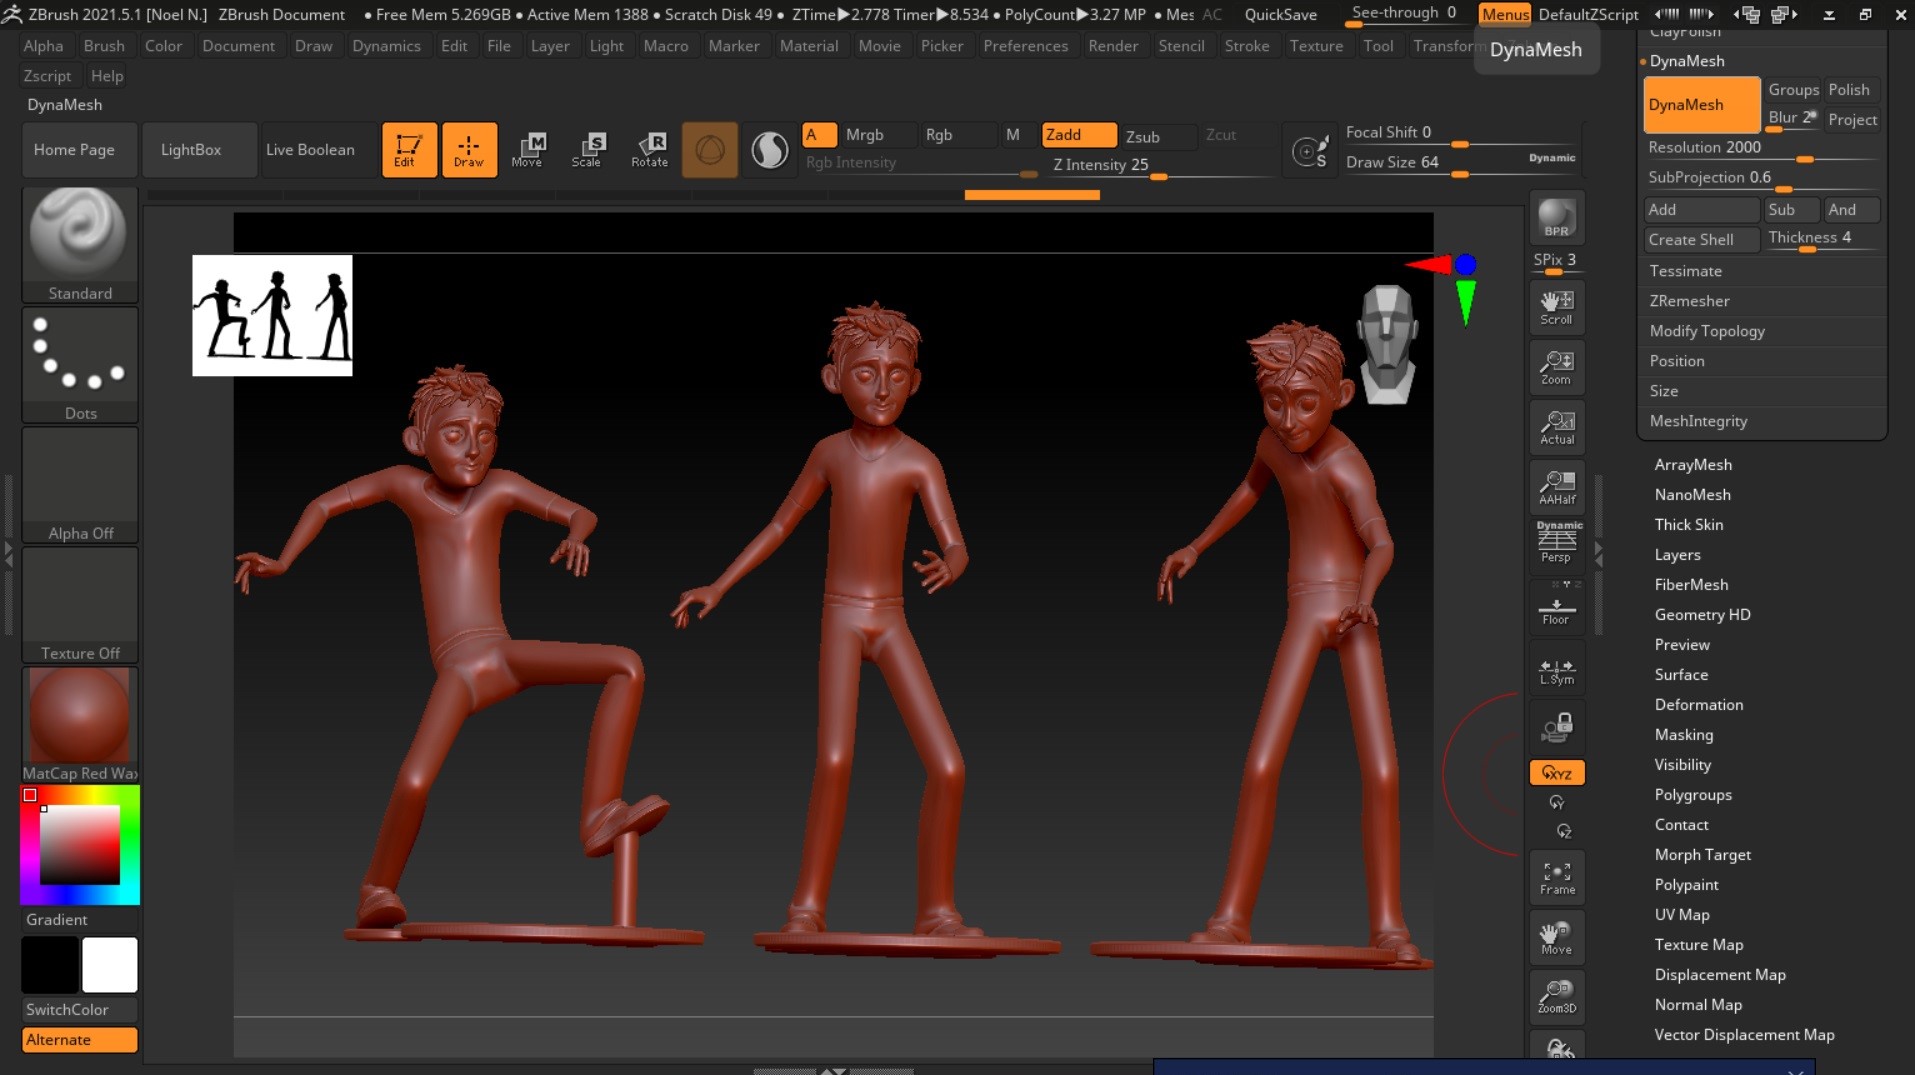
Once I was satisfied with the animation and layout, I exported the
figures as .obj files in batches of 3 or 4 and imported them into a
program called Zbrush. Here you can push the geometry and do more
advanced modeling, but my goal was to make the geometry "water tight"
for 3D printing, and this was done be re-meshing the model using
"Dynamesh".
Once the model was sealed, I saved it as a .stl file.
Here is a tutorial that I used to figure it out!
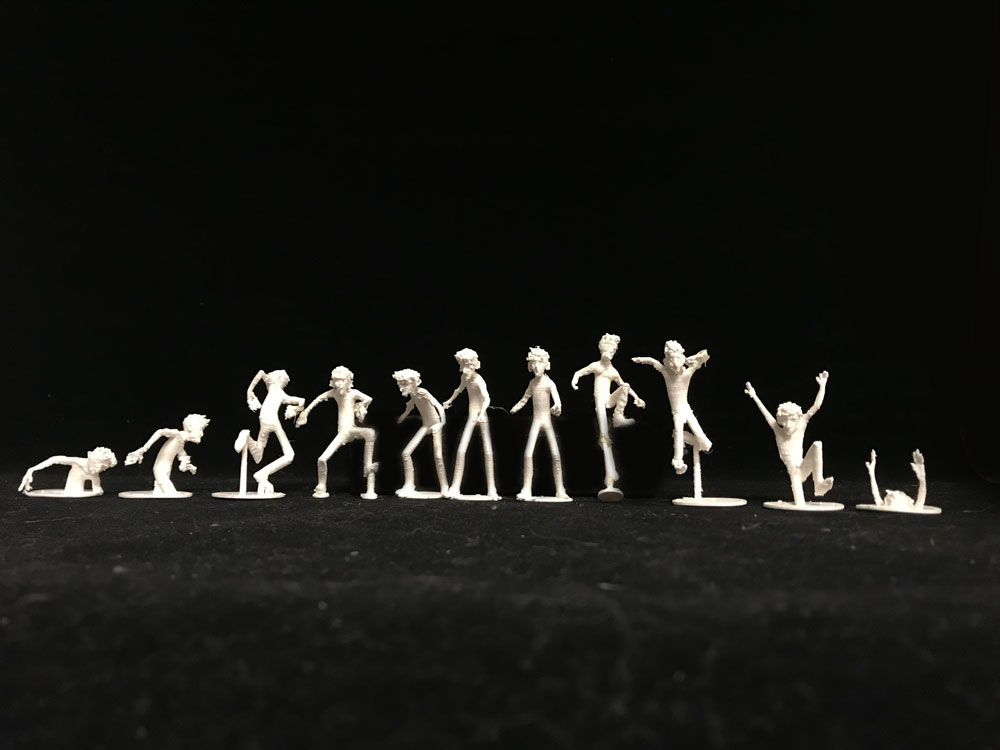
Printing
From Zbrush, I moved to a program called Cura which is used to prepare the models for 3D printing by establishing the scale, orientation, and determinig if any structural support is needed to prevent gravity from destroying your hot plastic!
 |
 |
 |
 |
 |
 |
 |
 |
 |
Re-adjustments
 |
 |
 |
 |
 |
Conclusion
